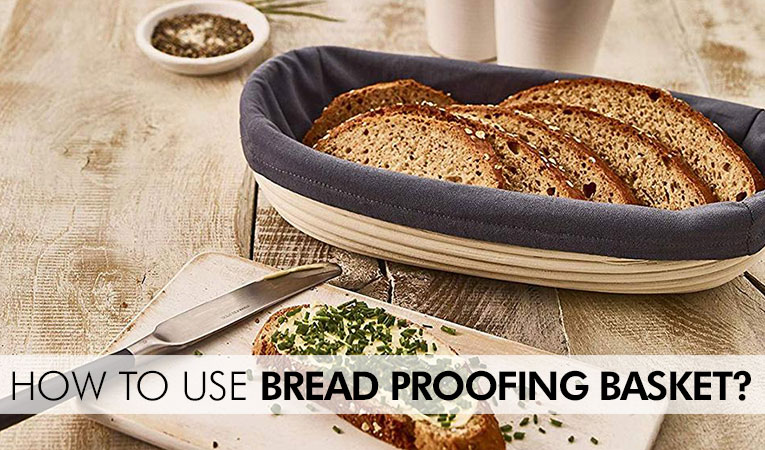
How to Use Bread Proofing Basket?
31-01-2021

A bread proofing basket forms an integral part of a baker’s tools and are used to shape the dough appropriately while proofing which is an essential step to activate the yeast. These special baskets are made of different materials including cane, wood fiber, rattan, wicker and even terracotta. Baskets made of rattan cane are particularly recommended for those trying their hands on professional bread baking. Bakers love these as they form an attractive spiral print on the crust and also facilitate hassle-free proofing. If you aren’t sure as to why and how to use these proofing basket or how to pick a suitable one then the information shared here should come handy. So, read on to find out!
Features of Bread Proofing Baskets
Bread proofing is done using various methods. This includes the use of linen cloth, wicker baskets, plastic containers and terracotta pots. However, none of these match the results rendered by a banneton basket prepared using rattan. Here are some of the features of this basket:
- The material used to prepare it is completely organic. It is devoid of any kind of harmful chemicals.
- It makes proofing much easier. This is why it is suitable for seasoned bakers as well as the novice.
- Bread proofing basket is usually available in different shapes though the ones most commonly used are round and oval shaped baskets.
- This banneton basket reduces the moisture of the dough that in turn creates a dry skin on the dough and makes it easier to score.
How to use Banneton Bread Proofing Baskets?
Banneton have gained popularity over the time as they offer the ease of proofing. However, one can manage this task efficiently with its use only if he knows the correct way to do so. Here is a step by step guide to use a bread proofing basket correctly:
- You may start by lining the basket with a thin linen cloth. This will render a smooth texture to your dough. However, it is not mandatory to do so. You can even use the basket as it is too.
- You can choose to use the basket with a light linen cloth or dust it with rice flour. Before dusting with rice flour, spray some water and clean it with a clean cloth so that the basket is little damp.
- Whether you choose to add that layer of linen or not, you must dust the basket lightly with flour. Rice flour is considered the best option to accomplish this task.
- Next, tap out any excess flour from the bread proofing basket. The non-sticky substance absorbs the moisture from the dough that aids in proper proofing. Your dough wouldn’t stick to the surface if the basket has been dusted properly.
- Now, allow the dough to completely proof within the basket so as to give your bread loaf a sturdy shape. It is suggested to pre-shape the dough as you place it in the basket.
- Flour the top of the dough lightly and cover it with towel.
- Proofing should take around 1 to 3 hours depending on recipe you are follow. It is suggested not to over proof.
If you aren’t able to get this right in the first try then don’t get disheartened. In order to ensure you perform the task efficiently, it is essential to condition the bread proofing basket. And it takes a minimum of three uses to condition it appropriately. So, the dough may appear sticky and might not come off well the first few times. But once the basket gets conditioned after a few tries then you will become a pro at proofing the bread.
Just make sure the basket is kept in the sun for a couple of hours after every use so that it dries and does not grow moulds. Any leftover dough particles must be brushed off to clean it thoroughly. It must not be soaked in water or washed.
How to Choose a Bread Proofing Basket?
Now that you know the importance of using these baskets and also the procedure to use the same, it is time to learn how to choose suitable ones. Choosing the right size is important because a basket that is too small compared to the dough quantity will result in overload as the level of the dough rises. On the other hand, a big one can lead to the formation of a lumpy loaf. Here is the ideal size you must choose based on dough quantity:
- A 20 cm round bread proofing basket should be an ideal choice for those planning to proof 500grms of dough.
- A 25 cm oval proofing basket is the best choice for proofing 1 kg dough.
- Though 20 cm and 25 cm proofing baskets are quite in demand and are readily available in the market, you can also lay hands at ones that are bigger in size. Professional bakers who require preparing large quantity of dough can go for 39 cm long proofing basket suitable for long bread loaf.
We hope this clears all your doubts and apprehensions about the need and use of a bread proofing basket. This special basket is specially designed to facilitate a better rise and a consistent crust. Thus, its importance can certainly not be undermined. Top bakers across the globe vouch for this proofing basket. Using it is quite easy and it takes just a few simple steps to do so, however these steps must be followed diligently. The information shared above should help you choose the right size. We have all these sizes proofing basket on offer and guarantee high quality product.
So, if you still haven’t bought this essential tool and are struggling with the proofing part then it is time you purchase a high quality rattan basket and accomplish the task in a quick and hassle free manner.


