Effortless Dough Kneading with KitchenAid Mixers: Benefits and Techniques
28-08-2023

Baking has always been a labor of love, but thanks to modern advancements in kitchen technology, some of the more labor-intensive tasks have become a whole lot easier. Kneading dough, once a time-consuming and physically demanding process, has been revolutionized by the introduction of KitchenAid mixers. These versatile appliances have become a staple in many kitchens, transforming the way we approach baking. In this blog, we'll delve into the numerous benefits of using a KitchenAid for kneading, making your baking endeavors more efficient, enjoyable, and ultimately, more delicious.
5 Benefits of Using a KitchenAid for Kneading
The KitchenAid mixer is a beloved tool in every baker's arsenal, and its capabilities extend beyond mixing. When it comes to kneading dough, this versatile appliance offers a range of benefits that streamline the baking process. In this section, we will delve into the remarkable advantages of using a KitchenAid for kneading, making your baking endeavors more efficient and enjoyable.
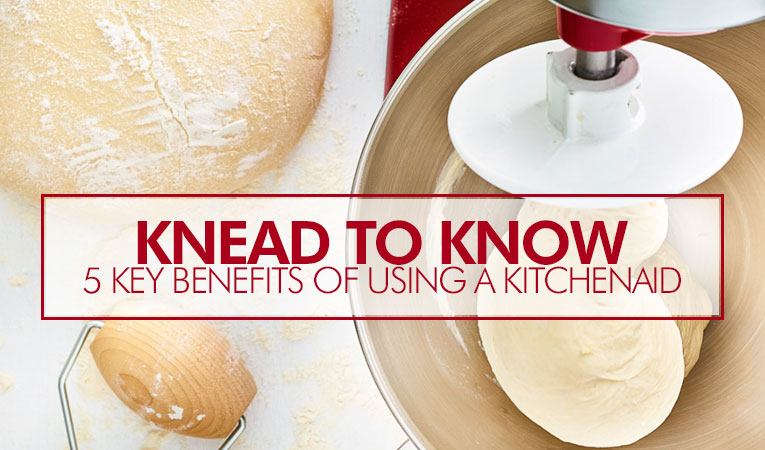
- Time and Effort Saver: Kneading dough by hand is a rigorous task that demands time and energy. With a KitchenAid mixer, you can bid farewell to the laborious process. The powerful motor and specially designed dough hook do the work for you, leaving you with more time to focus on other aspects of your recipe.
- Consistency in Kneading: Achieving the perfect consistency in dough can be tricky when kneading by hand. Uneven kneading can result in uneven textures and inconsistent baking. A KitchenAid ensures that your dough is kneaded uniformly, leading to consistently delightful baked goods.
- Hands-Free Convenience: Kneading dough can be a messy affair, leaving your hands sticky and flour-covered. A KitchenAid mixer provides a hands-free solution, allowing you to multitask or simply relax while the machine takes care of the kneading.
- Precision and Control: Different recipes call for different kneading speeds and durations. KitchenAid mixers offer variable speed settings, ensuring that you have precise control over the kneading process. This level of customization contributes to the success of your recipes.
- Versatility Beyond Kneading: While excellent for kneading, a KitchenAid mixer is a versatile tool that can handle a variety of tasks. From whipping cream to mixing batters, it's an all-in-one companion for your baking adventures.
How to Use a Kitchen Standing Mixer for Kneading Application
Mastering the art of kneading dough with your KitchenAid mixer opens up a world of baking possibilities. With these step-by-step instructions, you'll be able to achieve perfectly kneaded dough effortlessly, ensuring consistent and delicious results in your baked creations.
- Assemble the Right Tools - Ensure you have the dough hook attachment ready. This uniquely designed hook is tailored for optimal kneading.
- Prep Your Ingredients - Gather all the ingredients needed for your chosen dough recipe. Whether it's bread, pizza, pasta, or cookies, ensure everything is ready to go.
- Attach the Dough Hook - Securely attach the dough hook to the mixer's attachment hub. This is usually located on the front of the machine.
- Add Ingredients - Begin by adding your dry ingredients, followed by the wet ingredients as specified by your recipe. Make sure to follow the recipe's order to achieve the best results.
- Start on Low Speed - Turn on the mixer on its lowest speed setting. This initial low speed allows the ingredients to combine smoothly without splattering.
- Gradually Increase Speed - Gradually increase the speed setting to guide the dough into its kneading phase. This controlled progression ensures even distribution of ingredients.
- Monitor the Process - As the dough hook works its magic, observe the mixture closely. You'll notice the ingredients transforming into a cohesive mass.
- Achieving the Right Consistency - Keep a watchful eye on the dough's texture. It should form a soft, elastic ball that doesn't stick to the sides of the bowl.
- The Windowpane Test - To ensure proper gluten development, perform the "windowpane test." Take a small piece of dough and gently stretch it between your fingers. If it forms a thin, translucent membrane without tearing, you're on the right track.
- Timing Matters - The kneading process usually takes around 8-10 minutes, depending on the recipe. Refer to your specific recipe for accurate timing.
- Pause and Check - Pause the mixer periodically to check the dough's consistency. Remember that over-kneading can result in tough textures, so avoid excessive mixing.
- Voila! Perfectly Kneaded Dough - Once your dough has achieved the desired consistency, stop the mixer and marvel at the smooth, supple texture you've achieved.
With these easy steps, you're well-equipped to utilize your KitchenAid mixer for kneading various dough types. Let your culinary creativity shine as you explore different recipes and savor the convenience and precision that your KitchenAid brings to your baking endeavors.
Versatile Dough Kneading with KitchenAid
Unlocking the full potential of a KitchenAid mixer goes beyond its impressive kneading capabilities. This powerhouse appliance can expertly handle a variety of dough types, offering consistent and flawless results every time. From timeless favorites to imaginative creations, here are several well-loved dough varieties that your KitchenAid can expertly knead:
- Bread Dough: Whether it's a rustic artisan loaf or a soft sandwich bread, a KitchenAid mixer can effortlessly knead bread dough to perfection. Its powerful motor and well-designed attachments ensure even distribution of ingredients, leading to an ideal texture for rising and baking.
- Pizza Dough: Crafting the perfect pizza dough requires just the right balance of elasticity and tenderness. A KitchenAid mixer excels in kneading pizza dough, creating the ideal foundation for your favorite toppings.
- Pasta Dough: Making fresh pasta at home is a joy, and a KitchenAid mixer simplifies the kneading process. Whether you're crafting delicate strands of fettuccine or hearty sheets of lasagna, your pasta dough will be consistently smooth and ready for shaping.
- Cookie Dough: Certain cookie recipes benefit from a gentle kneading process that ensures a balanced texture and flavor. KitchenAid mixers are well-suited for cookie dough that requires precise blending without overworking the ingredients.
Simple Tips for Kneading Dough with KitchenAid
Mastering the art of kneading dough is essential for achieving perfect bakes, and with KitchenAid mixers, this process becomes a breeze. Whether you're a seasoned baker or a novice, these simple tips will guide you through the nuances of kneading dough using your KitchenAid mixer. Say goodbye to tired arms and hello to flawlessly kneaded dough!
- Use the Right Attachment: For dough kneading, attach the dough hook to your KitchenAid mixer. This uniquely designed hook mimics hand kneading, ensuring optimal gluten development without the labor.
- Start Slow: Begin kneading on a low speed setting to combine the ingredients. Slowly increase the speed to achieve proper dough consistency.
- Monitor Consistency: Keep a watchful eye on the dough as it kneads. It should form a smooth, elastic ball that detaches cleanly from the sides of the bowl.
- Time It Right: Most doughs require around 8-10 minutes of kneading. However, follow your recipe's guidelines for the best results.
- Test the Windowpane: To check if the dough is ready, perform the "windowpane test." Gently stretch a small portion of the dough between your fingers. If it forms a thin, translucent membrane without tearing, it's properly kneaded.
- Avoid Over-kneading: While KitchenAid mixers are efficient, it's important not to over-knead the dough, which can result in tough textures. Follow your recipe and use visual cues to determine when the dough is ready.
Incorporating a KitchenAid mixer into your baking routine opens up a world of possibilities for effortlessly achieving perfect dough consistency. With its versatility and precision, it's a reliable companion for both novice and experienced bakers. So, explore these dough options and create culinary delights that showcase the magic of your KitchenAid mixer.
If you have any tips or tricks for kneading dough with a KitchenAid, we'd love to hear from you. Share your insights in the comments below and let's continue to elevate our baking experiences together.
Conclusion
The KitchenAid mixer has become an indispensable tool in the world of baking, particularly when it comes to kneading dough. It's a game-changer that simplifies the process, guarantees precision, and unlocks more time for you to savor the creative and rewarding aspects of baking. So, whether you're a seasoned baker or a novice, investing in a KitchenAid mixer is a decision that will elevate your baking game and lead to kneaded perfection.
If you have any other suggestions, feel free to share them in the comments below. And remember, with a KitchenAid at your side, you're not just baking; you're creating culinary masterpieces. Happy baking!


